Friday, November 21, 2014

Refinishing A Dining Room Table

I swear this is going to be the last post (for a while, at least) about refinishing anything. But, this is a little different from the other things I've posted about, which is why I decided to go ahead and share.

Earlier, we told you we moved everything out of the dining room so we could refinish the floor. When then time came to move everything back into the dining room, we took a hard look at the dining room table. The finish had lots of nicks and scratches and worn spots. This wasn't a surprise because we (mostly me) have put this table through a lot in the last 35 years. I've used it as my cutting table for dozens of sewing projects and as my work bench for stripping off old car seat upholstery and then cutting, sewing, and installing the new upholstery. It's where I start my seedling garden plants in the spring. We've used it to inventory boxes of old car parts. It's no wonder the finish on the table looked so bad.


E used his small orbital sander to take off the old finish, starting with the leaf in the middle. If you look closely at the upper edge of the section on the right, you can see how badly the finish was worn in places. Also, when you look at these "before" photos, notice how the finish hides the grain of the wood.


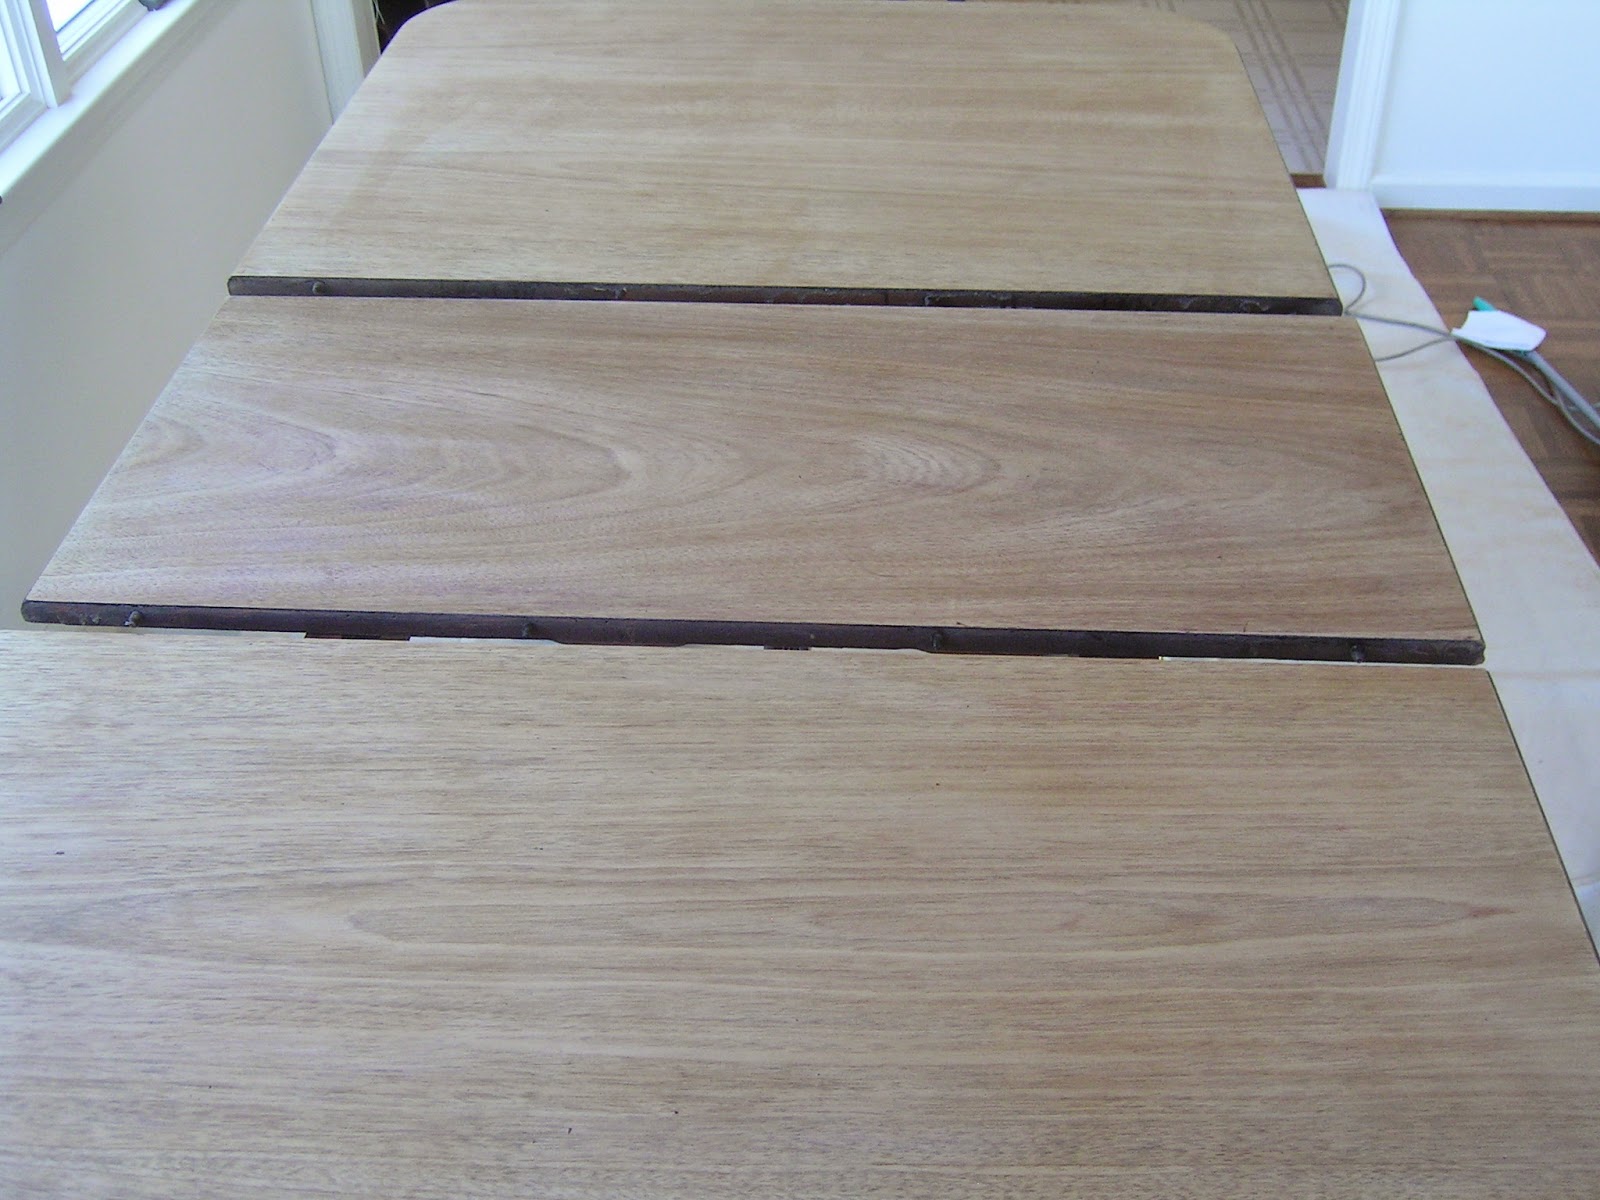
E had the entire table sanded in a couple of hours. It would have gone faster, except we did this inside so he had a bag on the sander to catch the dust and he had to stop sanding and empty the bag every ten minutes. Here's what the entire table top looked like when E finished sanding.


The next step was to stain the table to match the rest of the furniture. Even though we used the lightest mahogany stain we could find, we wiped it off almost as soon as we brushed it on. The directions on the can said to leave it on for five to fifteen minutes before wiping off whatever hadn't soaked into the wood. If we'd done this, the table would have been way too dark.  Here's the table with the stain on it.


Next came six coats of satin finish polyurethane coating.


It hardly looks like the same table, does it? There was a nice wood grain hiding under the old finish and the polyurethane will protect the finish for many years to come.

Wednesday, November 12, 2014

Upper Tension on a Lady Kenmore 89

Yesterday, I used my Lady Kenmore 89 to make a simple scarf.  I nearly drove myself nuts in the process because I couldn't get the upper thread tension adjusted properly.  On all of my other sewing machines, I adjust the upper thread tension by turning the little knob on the tensioner from 1 to 6, for example, until the tension is set properly.  The LK89's upper tensioner is marked 1 through 6, and even though I turned the knob all the way from 1 to 6 yesterday, it didn't make much of a difference in the upper thread tension.

This morning, I had one of those head slapping "how stupid could I possibly be" moments when E opened the LK89 manual and pointed to one of the drawings.  In the interest of sparing someone else the same crazy-making day I had yesterday, here's what the drawing pointed out:  To adjust the upper thread tension on the LK89, you don't just turn the knob from 1 to 6.  You turn it from 1 to 6 and then you keep turning it.  If you have your LK89 tension set at 3 and you move it to 4, you haven't done much of anything.  You need to move it to 4 and then keep turning (and turning) if you want to see a difference in the tension.

This is completely obvious when you look at the little hash marks on the top of the tensioner.  Notice in the first photo, above the number 6, you see four little hash marks.  In the second photo, above the number 6, you see only two little hash marks.  This is because I turned and turned and turned the tensioner knob, going past the number 6 a couple of times.  (I took the bottom cover plate off when I took the photo to keep it from acting like a mirror.  Also, you can ignore the blue tape -- I was using it as a seam guide.)


So, there you have it.  Now you know a couple of things you might not have known before you read this blog post:  First, you know how to adjust the upper thread tension on a Lady Kenmore 89.  Second, you know just how dense I can be.  

Saturday, November 8, 2014

Refinishing a Pair of End Tables

Six months ago, I went to a church rummage sale and found two Lane end tables for $5 each.  They were dull and had lots of water rings on them, but I knew they would look great once they were refinished.  After a lot of wiggling and re-arranging and moving the front seats forward as far as possible, I managed to fit them into the back of my Chevy Spark and I hauled 'em home.

Recently, E sanded them and stained them and brushed on a couple of coats of satin polyurethane, and here's how they look.


Pretty nifty, eh?  I just listed my living room end tables on craigslist, and replaced them with these two.  Thanks, E!!!