Friday, March 13, 2015

Zipper Pouch

I was roaming around youtube after watching another episode of The Great British Sewing Bee, and I ran across a Missouri Star Quilt Company tutorial for a zipper pouch. I gave it a whirl and here's the result:


The lining is red and there's a layer of fleece sandwiched between the outside and the lining so the pouch is nice and soft. This one is 9 x 9 inches, but you can make them any size you want. I bought a dozen handbag zippers (assorted colors) from an eBay seller for less than $10 so I can make a few more pouches and use up more of the scraps I have stashed away. If you have any scraps you'd like to put to good use, take a look at the MSQC tutorial and see how easy these are to make. Happy sewing, everyone!


Wednesday, March 4, 2015

Getting Ready For Spring

The 2014-15 winter threw a lot at us here in the mid-Atlantic region. We had brutally cold temperatures. We had snow. And ice. And freezing rain and sleet. And more snow. And more cold temperatures. We sanded, shoveled, scraped, made lots of chili, and filled the bird feeders hundreds of times. Weeks ago, we ran the white flag up the frozen pole, but Mother Nature refused to accept our surrender. Tomorrow's forecast is for 8+ inches of snow followed by single-digit temperatures.


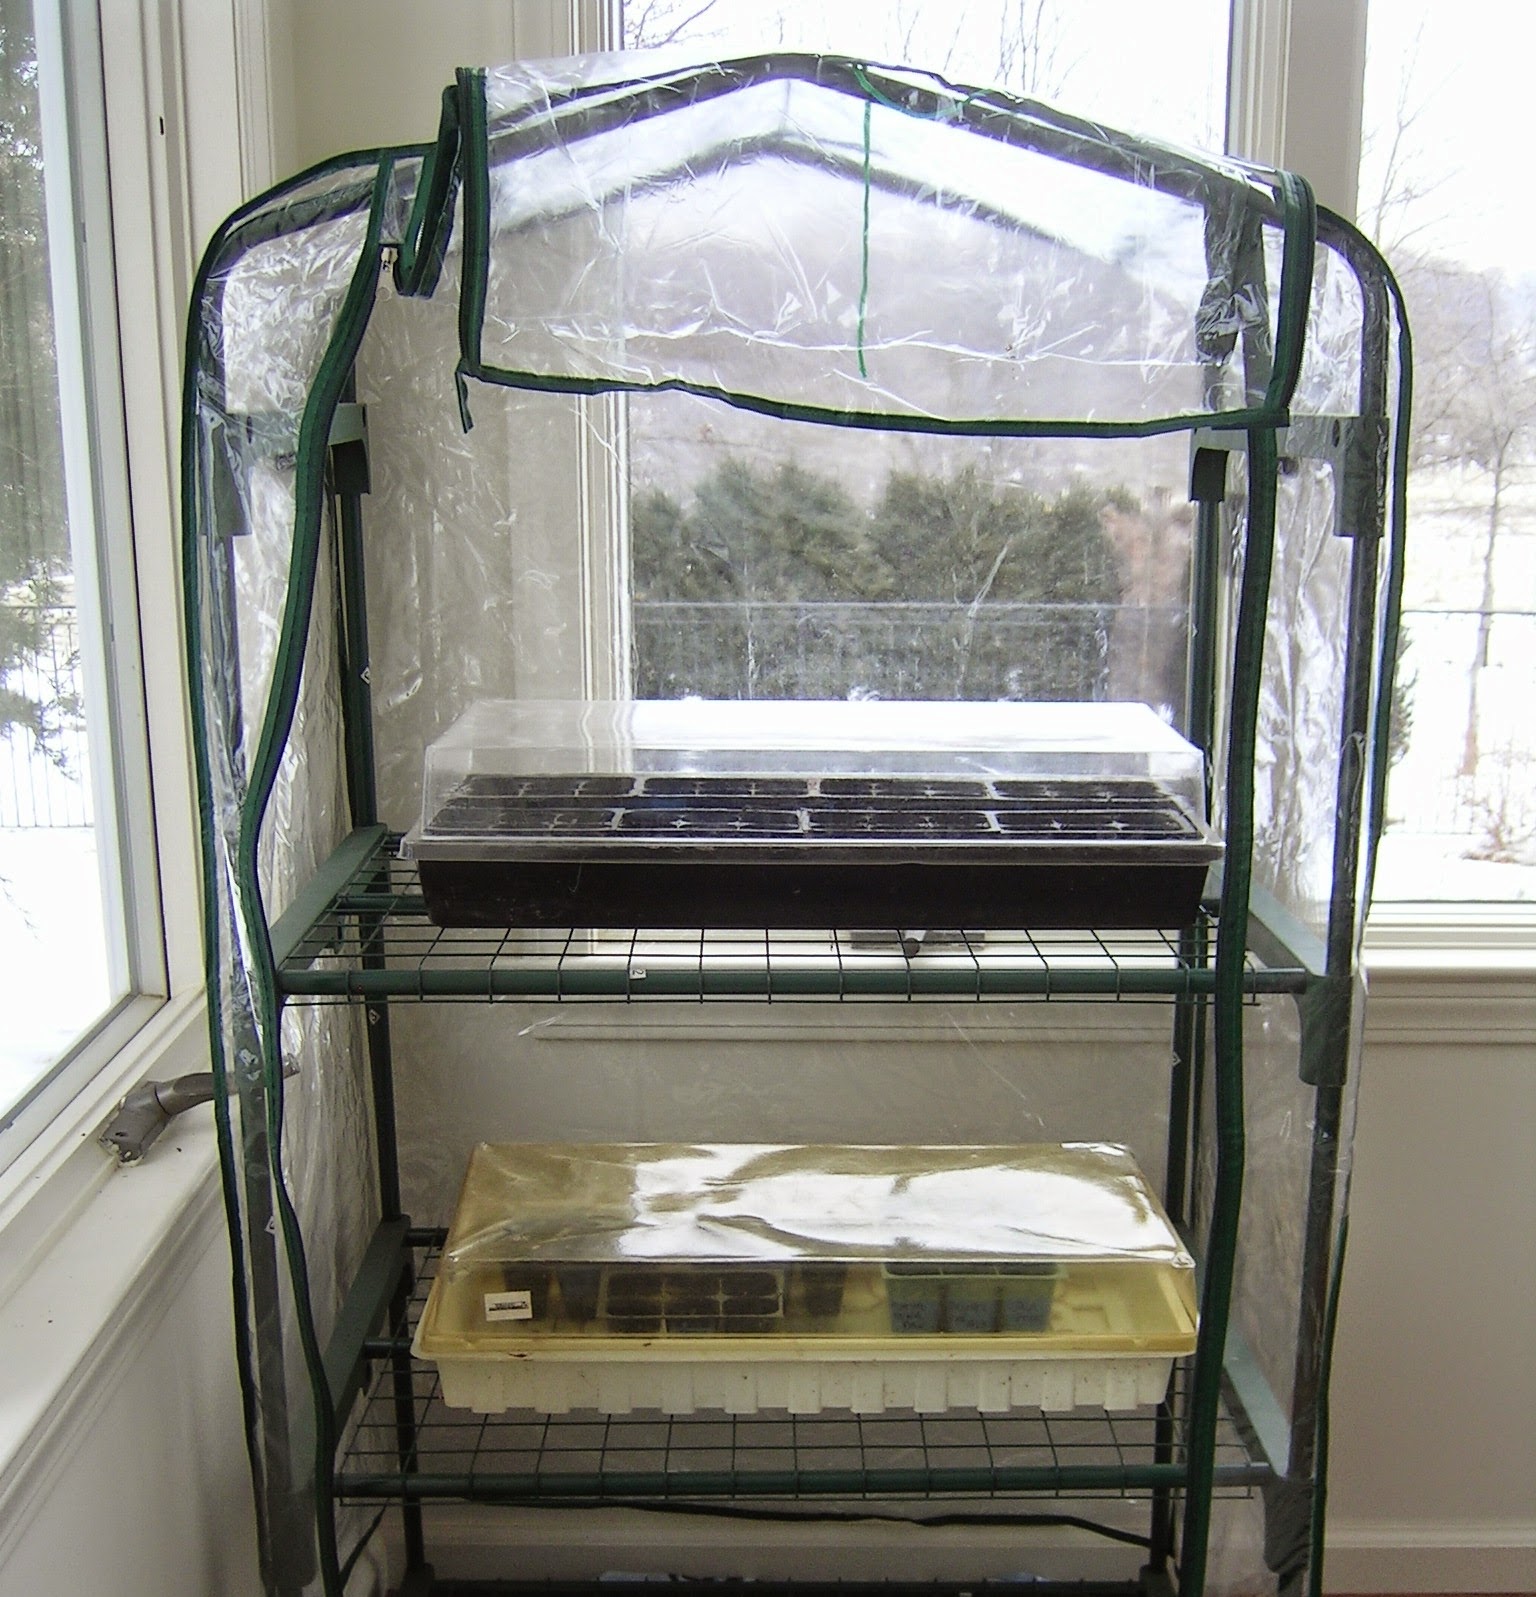
This morning, we decided to ignore winter and get ready for spring by starting some seeds. We have one of those little cube refrigerators and it's stuffed with seeds. There are flower seeds which my late grandmother gave us decades ago. The hottest of our hot pepper seeds are from my 90-year old aunt's garden. A friend gave me seeds from two varieties of tomatoes she's grown for many years. Some seeds we saved from plants we got at plant exchanges. There are a few packets of “store bought” seeds and some seeds whose origins are a mystery. We sifted through all of them today and decided to start twenty varieties of peppers and four varieties of tomatoes. After we finished tamping the seeds into containers of potting soil, we put the containers into trays, covered the trays with clear tops, put the covered trays on shelves in a little plastic greenhouse, and closed the two zippers in the front. (In the photo, the front is open, so you'll have to imagine it zipped closed.) 


The greenhouse sits in a corner of the dining room which will be sunny the next time we see the sun.  When spring arrives, we'll be ready! 

Saturday, February 14, 2015

Bird Strike Deterrent

Hello fellow bird watchers. Once in a while, a bird slams into one of our dining room windows. We always run outside, scoop them up, and hold them until they're ready to fly away. Nearly all of them live, but we still feel awful about it. So, this morning I used some scraps of clear vinyl (approximately .004" thick - bought it at JoAnn's) left over from another project and a black marker and made two of these:


The vinyl is really transparent and I had to take more than one photo to make it show so you could see it. When you're in the dining room, you sort of look through the webs and hardly notice them. The vinyl sticks to the windows by itself, just like a screen protector on an iPad, without any adhesive. Our hope is the birds will see the webs and choose a different route.  I mean, who doesn't hate running into a spider web, right? 

Thursday, January 15, 2015

Christmas in January


Nearly two years ago, we planted 2,100 tiny trees which are protected by plastic tree shelters held in place with wooden stakes. Even though some of the trees are now more than six feet tall, we need to keep the shelters in place until they're quite a bit bigger. Unfortunately, the deer and damp weather combine forces to make sure the shelters fall over regularly, which means we have to reinstall them. We've been doing this on foot while carrying all of the equipment we need to get the job done. Juggling the shelters and the stakes while carrying a shovel and a small sledge hammer wasn't a lot of fun. Neither was walking back and forth to the barn when we discovered we needed a cable tie and walking back and forth again when we discovered we needed a length of twine and walking back and forth again . . . . . You get the idea. This is what they looked like in April 2013:


We started looking for a reasonably priced John Deere Gator (or something similar) to carry our “stuff” and to spare us the endless walks to and from the barn, when we found this little guy on craigslist.


The engine, drive train, wheels, and body belonged to a 4x4 John Deer Gator, and the clever guy who sold it to us turned it into what you see in the photos. It runs like a champ. It has headlights and a blindingly bright spot light. There's a windshield wiper and a fan. The prior owner did some nice wood work under the removable dump bed. 


The snow plow is stainless steel. 


The wooden cabin comes off with a few screws. 


It cost less than 20% of what we would have paid for a Gator without a cabin or a snow plow and we are 100% happy.  

Monday, December 29, 2014

Lucky Dog

On December 20, E made a Pilots 'n Paws flight for nine rescued dogs who began the day in North Carolina and ended up with rescue organizations in New Jersey and New York. Let's take a look at the passengers.

This mom and her four puppies were rescued by Pam. One of Pam's co-workers told her a family was planning to take these dogs to the local high-kill shelter the next day, so Pam picked them up and took them home with her and found a rescue group in New Jersey to take them.


These three siblings were rescued by a family who found them dumped in the middle of a road near their farm. The family kept them safe until Pam found a rescue group in New York to take them.


Lucky and his mom were living at an abandoned farm. Mike noticed the dogs and began stopping every day to feed them. As you can see, Lucky had a serious injury to his back. He also had a rip in his tongue. Mike got in touch with Pam, and Pam took Lucky home with her. The same New Jersey rescue group which agreed to take the mom and her puppies also agreed to take Lucky. Mike made arrangements to keep mom safe until she can make it to her rescue group in Connecticut.


Early in the morning on December 20, Pam loaded all nine dogs into her Jeep and headed for the airport in Roanoke Rapids, North Carolina, while Michele and her co-pilot Dennis flew to Roanoke Rapids from their home base in Maryland. All nine dogs boarded Michele's Cessna 172, and Michele and Dennis flew home where E met them. The dogs boarded E's Piper Cherokee and he flew them to New Jersey. The mom and her puppies and Lucky stayed in New Jersey with their rescue group, while the three siblings boarded Charlie's Piper Archer so he could fly them from New Jersey to their rescue group in New York.

In his first few days in New Jersey, Lucky had surgery to repair the rip in his tongue and to graft skin onto the wound on his back which the vet says was caused by a large bird. He is now in a good home where he will stay until his health issues are resolved and he's ready to be adopted. Here's how Lucky spent Christmas Day. A few days earlier, he wasn't able to lie on his back.


If you'd like to get the warm fuzzy reward which comes from helping an animal in need, take a look at the Pilots 'n Paws website.  

Friday, December 26, 2014

Button Foot Controller Repair


My Singer 401 has a button foot controller which I use by way of a knee bar. Until recently, the 401 had one speed – 100 m.p.h. It was polite enough to wait until I pressed on the knee bar before it started sewing. But, once it started, it went flat out all the time. E took it apart and fixed the problem and I thought I'd share how he did it.

You'll want to take a look at what Sid had to say about button foot controllers in his February 22, 2012 post at http://oldsingersewingmachineblog.com. Sid explains how the controller works and he has some great photos of the inside of the controller which will be helpful to you as you keep reading this post. (Thanks, Sid!)

E unscrewed the little feet on the bottom of the controller and took the top off the base. Someone had already removed the capacitor from between the two terminals, so it wasn't causing a problem. As you can see from Sid's photos, there's a screw which runs all the way through the white porcelain case which contains the variable resistance. The tip of the screw pokes up toward two little rectangular copper contacts and has a little plate attached to it. The little plate that's attached to the tip of the screw ought to touch the copper contacts when you have the button on the foot controller pressed all the way down. This gives you a resistance-free path from one terminal to the other and this is what gives you full speed.

When E looked inside my controller, he saw that when he pushed down on the t-shaped lever the button sits on, the little plate was touching the copper contacts well before the t-shaped lever was pushed all the way down. This explained the 100 m.p.h. speed.

To fix the problem, E slightly turned the screw clockwise which moved the little plate lower on the screw. He kept turning the screw until the little plate was barely touching the copper contacts when the t-shaped lever was pressed all the way down.


The button controller is back in the 401's cabinet and it works great. If you're having a similar problem, you might want to grab a screwdriver and give this a try. Happy Sewing!   

Tuesday, December 23, 2014

Singer 201


I'd been looking for a Singer 201 for a while and found one on craigslist which was advertised as not working. The seller was asking a fair price for a sewing machine which wouldn't sew, and E and I decided to buy it and see if we could revive it.

The machine came in a cabinet which held the original attachments and the manual.


We were planning to junk the cabinet, but decided to keep it because it's less than 30 inches long (with both leaves folded up) and we knew we could find room for it somewhere in the house. As you can see, E did a beautiful job of refinishing it.

Here's what it looked like when we brought it home. Lots of nicks, scratches, and dings.


And here's what it looks like now, after E refinished it.  Beautiful, eh?


Before we took the machine out of its cabinet, we did some preliminary diagnostic work. We plugged it in and flipped its little white toggle switch. The light came on and nothing smelled like it was burning, both of which were encouraging signs. Next, we tried to turn the hand wheel. It wouldn't budge. After ruling out a few other possible causes, we figured there must be a jam under the rotating hook assembly. Sure enough, when we removed the assembly, there was the tangle of doom. After we removed it (we needed tweezers and a flashlight) and put the assembly back together, we were able to spin the hand wheel.

The machine's cabinet had a built-in foot controller which didn't work. However, there was an after-market foot controller installed on the machine and when we very briefly pressed on it, the motor hummed and the needle bar went up and down.

Next, we took the machine out of the cabinet, blew the dusty bits out of its nooks and crannies, and polished all of the shiny parts. It looked good. But would it sew?


After we oiled and lubricated it, we took it for a test drive. There was a problem with the thread tension which ended up being a problem with the bobbin thread tension. After a little bit of adjustment, the thread tensions were balanced and the 201 was ready to sew.

This 201, which was made in 1950, purrs like a kitten and sews a beautiful stitch, plus the cabinet is gorgeous. I'm happy to add it to my herd.